


 Rosie Fielding
 There’s a particular kind of satisfaction that comes from lining up jars of homemade plum jam on a shelf, each one glowing a deep ruby-purple in the light.
It’s one of the simplest preserves you can make at home, and Mary Berry’s version proves that you don’t need fancy equipment, shop-bought pectin, or years of practice to get it right.
What Makes This Plum Jam Recipe Special
Plums are one of the few fruits that don’t need any help to set into a proper jam. Their skins and stones are naturally rich in pectin, the substance that gives jam its wobble and spreadability. That means there’s no need to buy specialist “jam sugar” with added pectin — ordinary granulated sugar does the job perfectly well.
The other thing that sets this recipe apart is its simplicity. There are only three core ingredients, and the method relies on classic jam-making technique rather than shortcuts.
It’s forgiving, too. Slightly underripe plums, slightly overripe plums, big ones, small ones — they’ll all make a good jam, provided you understand how ripeness affects the finished set.
Ingredients for Plum Jam
- Plums (around 1.5–2kg, stoned and roughly chopped) – the base of the jam. Their natural acidity and pectin do most of the heavy lifting.
- Granulated sugar (roughly equal weight to the prepared fruit) – sweetens the jam and acts as a preservative, helping it keep for months.
- Lemon juice (2–3 tablespoons) – boosts the pectin content and balances the sweetness with a little sharpness.
- Water (100–200ml) – helps soften the plums gently before the sugar goes in, preventing them catching on the base of the pan.
- A small knob of butter (optional) – stirred in near the end, this disperses any foam on the surface for a clearer, glossier finish.
Victoria plums are the classic choice in Britain, prized for their balance of sweetness and acidity, but any firm, ripe eating or cooking plum will work. Damsons, Czar plums, and Marjorie’s Seedling all make excellent jam too, though the more tart varieties may need a touch more sugar to balance them out.
It’s worth weighing your plums after stoning rather than before, since the weight of the fruit changes once the stones are removed. This matters because the sugar quantity is based on the weight of the prepared fruit, and getting that ratio right is what determines whether your jam sets properly.

Equipment You’ll Need
You don’t need specialist kit, but a few basics make the process far easier:
- A large, heavy-based preserving pan or stockpot, with plenty of room for the jam to bubble up without boiling over
- A sugar thermometer (helpful but not essential)
- Sterilised glass jars with lids
- A jam funnel and ladle for potting up cleanly
As an Amazon Associate, we may earn from qualifying purchases.
Step-by-Step Method
Prepare the plums. Wash them, then halve and remove the stones. There’s no need to peel them — the skins soften down beautifully and add colour and flavour.
Soften the fruit. Put the plums into your preserving pan with the water. Bring to a gentle simmer and cook for 15–20 minutes, stirring occasionally, until the fruit has completely broken down and softened.
Add the sugar and lemon juice. Once the plums are soft, stir in the sugar and lemon juice over low heat until every last grain of sugar has dissolved. This usually takes a few minutes — don’t rush it, and don’t let the mixture boil until the sugar has fully disappeared, or the jam can turn grainy.
Bring to a rolling boil. Turn the heat up and let the jam boil hard, uninterrupted, for around 10–15 minutes. Stir occasionally to stop it catching on the bottom of the pan.
Test for setting point. From about the 8-minute mark, start testing. Drop a small spoonful onto your chilled saucer, wait 30 seconds, then push it gently with a finger. If the surface wrinkles and holds its shape, the jam has reached setting point (around 105°C/220°F if you’re using a thermometer). If it’s still runny, boil for a few more minutes and test again.
Skim and rest. Take the pan off the heat. Skim off any foam with a spoon, or stir in a small knob of butter to disperse it. Let the jam sit for around 10 minutes before potting — this helps stop the fruit floating to the top of the jars.
Pot and seal. Ladle the hot jam into warm, sterilised jars like these available on amazon right to the top, seal immediately with the lids, and leave to cool completely on the worktop before labelling and storing.

Important Cooking Tips
Choosing ripe but firm fruit makes a real difference. Overripe, soft plums have already lost some of their natural pectin, which can leave you with a jam that never quite sets. If your plums are on the softer side, an extra tablespoon of lemon juice helps compensate.
Resist the urge to walk away once the jam is boiling hard. It can go from perfectly set to scorched surprisingly quickly, especially as the water content reduces and the sugars concentrate.
Warm your jars before filling them. Pouring hot jam into a cold jar can crack the glass, and warming also helps the jam settle evenly as it cools.
It also helps to work in a fairly large pan, even for a modest batch. Jam needs room to bubble up as it boils, and a pan that’s too shallow or crowded increases the risk of it catching, or worse, boiling over onto the hob. A wide surface area also speeds up evaporation, which gets you to setting point faster and helps the jam keep its bright colour rather than turning dull from prolonged cooking.
Timing your batch for when plums are properly in season, typically from late July through September in the UK, also makes a noticeable difference. Fruit picked at its peak has the best balance of natural sugar, acid, and pectin, all of which make the jam-making process more predictable.
Common Mistakes and How to Avoid Them
Jam that won’t set. This is almost always down to underboiling, using overripe fruit, or skipping the lemon juice. If your batch stays runny after cooling, you can return it to the pan, add a little more lemon juice, and reboil to setting point.
Jam that’s too stiff or toffee-like. The opposite problem — usually caused by overboiling past setting point. Test earlier and more frequently next time, and take the pan off the heat the moment the wrinkle test passes.
Crystallised sugar in the finished jam. This happens if the sugar wasn’t fully dissolved before the mixture was allowed to boil. Always stir patiently over low heat first.
Jars that don’t seal properly. Unsterilised jars are the usual culprit. Wash them in hot, soapy water, rinse well, then dry them in a low oven (around 140°C/275°F) for 10–15 minutes just before filling.

Variations
This plum jam takes well to a little extra flavour if you want to experiment:
A cinnamon stick or a few gratings of nutmeg added during the initial simmer gives the jam a warm, spiced note that works particularly well in autumn.
A split vanilla pod adds a rounder, more mellow sweetness.
Star anise, used sparingly, pairs beautifully with plums’ natural tartness.
If you don’t have lemon juice to hand, a splash of apple cider vinegar or a spoonful of unsweetened apple purée will provide similar acidity and pectin.
For a slightly less sweet result, you can reduce the sugar by up to 20%, though bear in mind this will shorten the jam’s shelf life and may need a longer boil to set.
How to serve Plum Jam
Plum jam earns its keep well beyond the breakfast table. A few favourites worth trying:
- Spread generously on hot buttered toast or spooned onto fresh scones alongside clotted cream for a classic cream tea.
- Swirled through thick Greek yogurt or porridge for a simple, fruity breakfast.
- Used as a glaze for roast pork or duck, where its sweet-tart character cuts through rich meat beautifully.
- Spooned onto a cheeseboard, especially alongside a sharp, tangy cheese.
- As a filling for a classic Victoria-style fatless sponge, thumbprint biscuits, or Bakewell-style tarts.

How to store it properly
Once sealed in sterilised jars, plum jam will keep in a cool, dark cupboard for up to a year. Check the lids haven’t lost their seal (the button in the centre of the lid should stay pressed down) before eating.
After opening, store the jar in the fridge and use it within four to six weeks.
Frequently Asked Questions
Do I need to peel the plums first?
No. The skins soften completely during cooking and contribute both colour and extra pectin, so there’s no need to remove them.
Can I use frozen plums instead of fresh?
Yes, though frozen fruit tends to have slightly less pectin than fresh, so you may need a few extra minutes of boiling to reach setting point. Thaw them first and drain off any excess liquid.
Why hasn’t my jam set even after boiling?
This usually means it hasn’t reached a true rolling boil for long enough, or the fruit was very ripe and low in natural pectin. Reboil with a little extra lemon juice and test again using the cold saucer method.
How do I know the jars are properly sterilised?
Jars washed in hot, soapy water and dried in a low oven for 10–15 minutes are ready to use. Alternatively, run them through a full hot dishwasher cycle and use them while still warm.
Can I reduce the amount of sugar?
You can reduce it slightly, but sugar isn’t just for sweetness here — it’s a preservative and helps the jam set. Cutting it back significantly will shorten how long the jam keeps and may leave it runnier.
Is a sugar thermometer essential?
It’s helpful but not essential. The cold saucer test — chilling a little jam and checking whether it wrinkles when pushed — is just as reliable and doesn’t require any special kit.
How do I make plum jam without pectin using 1kg of plums?
Simply scale the recipe down. For 1kg of stoned, prepared plums, use around 1kg of granulated sugar, 2 tablespoons of lemon juice, and about 100ml of water.
The method stays exactly the same: simmer the plums until soft, dissolve in the sugar and lemon juice, then boil hard until setting point is reached.
Because plums are naturally rich in pectin, there’s no need to add any shop-bought pectin at any batch size — the fruit does the work itself, provided it’s ripe but not overripe.
Final Thoughts
There’s real appeal in a preserve this straightforward. No pectin sachets to track down, no complicated equipment, just plums, sugar, and a little patience at the stove.
Once you’ve made a batch and watched it set properly for the first time, it becomes one of those recipes you return to every plum season — a small, satisfying ritual that fills the cupboard with something better than anything from a shop shelf.
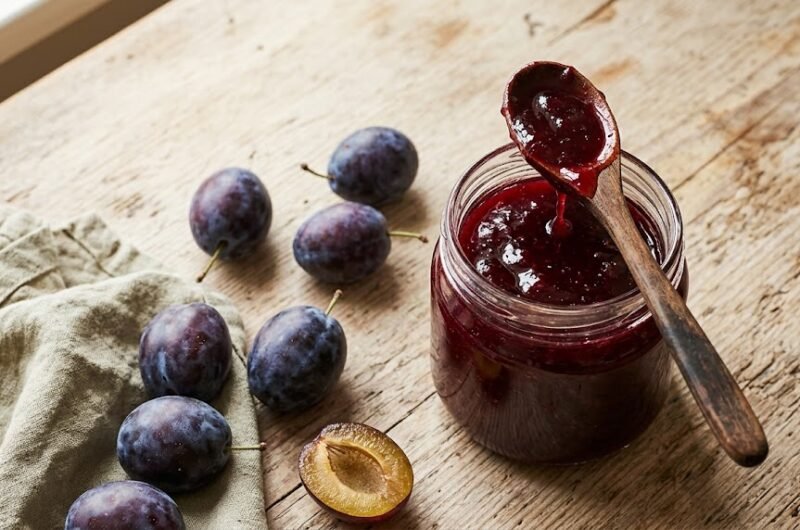
Easiest Mary Berry’s Plum Jam Recipe
5
servings20
minutes30
minutes40
kcal50
minutesA classic three-ingredient British preserve made from ripe plums, sugar, and a splash of lemon juice. Plums are naturally high in pectin, so this jam sets beautifully without any shop-bought setting sugar — just patience at the stove and a good rolling boil.
Ingredients
1.5 kilograms ripe plums, halved and stoned
1.5 kilograms granulated sugar
3 tablespoons lemon juice
150 milliliters water
1 teaspoons butter, to disperse foam (optional)
Directions
- Prepare the plums: Wash the plums, then halve them and remove the stones. There’s no need to peel them — the skins soften down and add colour, flavour, and extra pectin.
- Soften the fruit: Put the 1.5 kilograms ripe plums, halved and stoned into a large, heavy-based preserving pan with the 150 milliliters water. Bring to a gentle simmer and cook until completely soft.
- Dissolve the sugar: Stir in the 1.5 kilograms granulated sugar and 3 tablespoons lemon juice over low heat until every grain of sugar has fully dissolved. Don’t let it boil yet, or the jam can turn grainy.
- Boil to setting point: Turn up the heat and let the jam boil hard, stirring occasionally so it doesn’t catch. Start testing for setting point from around 15 minutes
- 15:00
- in.
- Test, skim, and rest: Drop a little jam onto a chilled saucer; if it wrinkles when pushed, it’s set. Take off the heat, skim off any foam or stir in the 1 teaspoons butter, to disperse foam (optional), then leave to rest for 10 minutes before potting.
- Pot and seal: Ladle the hot jam into warm, sterilised jars right to the top, seal immediately, and leave to cool completely before labelling.
Notes
- Use ripe but firm plums — overripe fruit has less natural pectin and may not set as well.
- If your jam stays runny after cooling, reboil it with a little extra lemon juice.
- Store sealed jars in a cool, dark place for up to a year; once opened, keep refrigerated and use within 4–6 weeks.


