


 Rosie Fielding
 A good homemade plum jam captures the best part of late-summer fruit: ripe, fragrant plums transformed into a glossy preserve with a lovely balance of sweetness and natural sharpness.
This Delia Smith plum jam recipe follows the traditional style of plum preserve associated with Delia’s Complete Cookery Course, where straightforward ingredients and careful cooking do most of the work.
The recipe is particularly appealing because you do not need commercial pectin or complicated equipment. Plums, sugar and lemon are the essentials, with a little water only if the fruit needs help softening. The important part is understanding the cooking stages and knowing when the jam has reached its setting point.
Ingredients You’ll Need
For approximately 3–4 medium jars, depending on the fruit and final evaporation, use:
- 1kg ripe plums, stoned
- 750g granulated sugar
- Juice of 1 lemon
- A little water, only if needed
The plums should be ripe and full of flavour, but they do not have to be perfectly soft. Very soft fruit will usually release plenty of liquid during the first stage of cooking.
Victoria plums are an excellent choice because they have a pleasant sweet-tart character and attractive colour. Other eating plums can also work well.
If your plums are particularly firm, adding a small amount of water can help prevent the fruit catching on the base of the pan before enough juice has been released.
Equipment for Homemade Plum Jam
You do not need specialist machinery, but the right pan makes the job considerably easier.
Use:
- A large, heavy-based preserving pan or saucepan
- A wooden spoon or heatproof spoon
- A ladle
- A small saucer or plate for testing the set
- Clean jam jars and suitable lids
- A jam funnel, if you have one
A large pan is important because boiling jam becomes extremely hot and can rise considerably as it cooks. Avoid filling a small saucepan close to the top.
Jam should always be handled carefully. Molten sugar can cause serious burns, so keep children away from the pan and take care when transferring the finished preserve into jars.
How to Make Delia Smith Plum Jam
1. Prepare the plums
Wash the plums thoroughly and remove their stones.
Cut larger plums into halves or smaller pieces. Smaller pieces will break down more quickly, while larger pieces can leave a more rustic texture.
Weigh the fruit after removing the stones so that you have the correct starting quantity.
If your plums are very ripe and juicy, you may find that no added water is necessary.
2. Soften the fruit
Put the prepared plums into your large pan.
Cook them gently over a low heat, stirring occasionally. The aim at this stage is to soften the fruit and allow its natural juices to come out.
Do not rush this stage by immediately turning the heat high.
If the fruit is particularly firm and looks in danger of sticking, add a small splash of water. Very soft plums should generally be allowed to release their own juices instead.
Continue until the fruit has become soft and pulpy.
3. Add the sugar
Once the plums are thoroughly softened, add the 750g granulated sugar.
Stir carefully until the sugar has completely dissolved.
This is an important point. You do not want undissolved sugar sitting on the bottom of the pan when you increase the heat, as it can catch and burn.
Once the sugar has dissolved, add the lemon juice.
4. Bring the jam to a proper boil
Increase the heat and bring the mixture to a vigorous boil.
The mixture should bubble actively rather than simply simmer.
Keep a close eye on the pan and stir as necessary, particularly around the bottom and sides.
As the water evaporates, the mixture will become thicker and the bubbles will change. This is when you need to pay attention rather than relying only on a cooking time.
A jam can take slightly different amounts of time depending on the fruit, pan size, heat and amount of water released by the plums.
5. Check the setting point
This is the stage that makes the difference between runny plum sauce and properly set jam.
Before you start cooking, put a small saucer in the freezer or refrigerator to become very cold.
When you think the jam is ready, remove the pan from the heat temporarily. Put a small spoonful of the hot jam onto the chilled saucer.
Leave it for a few seconds.
Then gently push the jam with your fingertip. If the surface wrinkles and the jam appears to hold its shape, it is approaching or has reached the setting point.
If it remains completely liquid, return the pan to the heat and boil for a little longer before testing again.
The cold-plate test is a traditional home-preserving technique and is specifically associated with the Delia-style method described in published accounts of this recipe.
Do not judge the final texture entirely while the jam is boiling. It will become considerably thicker as it cools.
6. Fill the jars
Once the jam has reached the correct setting point, remove it from the heat.
If there is obvious foam on the surface, you can carefully remove it.
Let the jam settle briefly, then transfer it into properly sterilised, warm jars.
Fill carefully, keeping the rims clean. Seal the jars according to the type of lids you are using.
Leave them undisturbed until completely cool.

The Most Important Tips for Plum Jam
The recipe itself is simple, but a few small details make the process much more reliable.
Use a large pan. Boiling jam is energetic and extremely hot. A roomy pan gives you space to stir and reduces the chance of the mixture bubbling over.
Do not add lots of water. Plums can release a surprising amount of liquid. Too much water simply means more evaporation is required later.
Dissolve the sugar before boiling hard. This reduces the risk of undissolved sugar catching on the base.
Use the setting test rather than the clock. Cooking times vary. The appearance and behaviour of the jam are better guides than an exact number of minutes.
Keep stirring sensibly. Stirring prevents the fruit from catching, but constant vigorous stirring is unnecessary.
Do not overcook it. A jam that is boiled for too long can become excessively thick, dark or caramelised.
Remember that hot jam is thinner. Always assess the set using a chilled saucer rather than expecting the texture of cooled jam while it is still in the pan.
What If Your Plum Jam Is Too Runny?
Do not panic if the jam seems loose once it has cooled.
First, remember that freshly cooked jam is naturally more fluid than completely cooled jam.
If the finished jars have cooled and the jam is still clearly too runny, empty the contents back into a clean pan and bring the mixture back to a boil.
Test it again using a chilled saucer.
A common reason for a soft set is simply that the mixture did not reach a sufficiently concentrated stage. The natural pectin level of plums can also vary according to the fruit.
Adding substantially more sugar is not usually the first solution. It is better to concentrate the preserve carefully and retest.
Can You Make It With Different Plums?
Yes. The recipe is flexible enough to work with several varieties.
Victoria plums give a particularly attractive colour and familiar sweet-tart flavour.
Damsons produce a more intensely flavoured, sharper preserve and are naturally well suited to traditional preserving.
Red or purple plums can create a deep-coloured jam with a rich fruit flavour.
If the fruit is exceptionally sweet, the lemon becomes particularly useful because it prevents the finished jam from tasting flat.
You can also leave some pieces relatively large if you prefer a more textured preserve rather than a completely smooth jam.
Can You Reduce the Sugar?
It is possible to make lower-sugar preserves, but it changes the recipe considerably.
Sugar contributes to sweetness, preservation and the final texture, so simply cutting the quantity substantially can result in a softer preserve with a shorter keeping quality.
For that reason, I would not recommend casually reducing the sugar in this traditional version.
If you specifically want a reduced-sugar plum spread, use a recipe designed for that purpose, usually with an appropriate setting agent and different storage instructions.
How to Serve Plum Jam
A jar of homemade plum jam is wonderfully versatile.
For breakfast, spread it generously over warm toast, crumpets or freshly baked bread.
It is also excellent with scones, particularly when served alongside clotted cream for a traditional afternoon-tea combination.
For baking, spoon it between sponge layers, use it as a filling for pastries or spread a thin layer beneath a cake topping.
The sweet-tart flavour also works surprisingly well with cheese. A little plum preserve alongside mature cheddar or a creamy soft cheese makes an easy addition to a cheeseboard.

For another classic British dessert idea, you could serve plum jam alongside a simple sponge or use it with a fruit-based pudding. If you enjoy traditional fruit desserts, our rhubarb crumble recipe is another useful recipe to keep in mind.
How to Store Homemade Plum Jam
Proper storage starts with clean, sterilised jars.
Once filled and sealed, allow the jars to cool completely before storing them in a cool, dark place.
Always check the jars before use. If you notice mould, fermentation, an unusual smell, a damaged seal or anything else that looks suspicious, discard the contents rather than trying to rescue them.
Once a jar has been opened, keep it refrigerated and use a clean spoon each time.
For the best quality, label your jars with the date you made them. This is particularly helpful if you make several batches during the plum season.
Can Plum Jam Be Frozen?
Freezing can be useful if you want to preserve a batch for longer-term use, although the traditional jarred method is the natural choice for this recipe.
If freezing, use a freezer-safe container rather than filling a glass jar too tightly, as the contents need room to expand.
Thaw the jam in the refrigerator and stir before serving if the texture has changed slightly.

Frequently Asked Questions
How long does plum jam take to make?
Allow roughly 30 minutes for preparing and softening the fruit, followed by the sugar-cooking stage and setting test. The exact cooking time varies according to how juicy the plums are and how quickly liquid evaporates.
Do I need jam sugar for this recipe?
No. The traditional version uses ordinary granulated sugar. The recipe relies on the fruit, sugar, lemon juice and correct cooking technique rather than requiring commercial jam sugar.
Can I use frozen plums?
Yes, although frozen plums can release considerable liquid as they thaw. Thaw them first and drain away excess liquid if necessary. You may need to cook the fruit for longer to reach the correct concentration.
Why has my plum jam not set?
The mixture may not have been concentrated enough, or the particular fruit may have contained less natural pectin. Return the jam to the pan, boil it again carefully and test a small amount on a chilled saucer.
Should I peel plums before making jam?
Usually, no. Plum skins soften during cooking and contribute colour and flavour. Removing them is unnecessary for a traditional rustic plum preserve.
Can I add spices?
You can, although that creates a flavoured plum jam rather than the straightforward traditional version. Cinnamon, star anise or vanilla can work with plums, but use them sparingly so the fruit remains the main flavour.
How do I know when plum jam is ready?
Use the chilled-saucer test. Place a little hot jam onto the cold surface, allow it to cool briefly and gently push it. A wrinkled surface indicates that the preserve is approaching the correct setting point.
What can I do with leftover plum jam?
Use it on toast and scones, spoon it over plain yoghurt, add it to cakes and pastries, or serve a little alongside cheese. It is also useful whenever a recipe calls for a fruity preserve.
Final Thoughts
This Delia Smith plum jam recipe is a good example of why traditional preserving does not need to be complicated. The ingredient list is short, the equipment is basic and most of the skill comes down to controlling the heat and recognising the setting point.
The 1kg-to-750g fruit-to-sugar ratio gives the preserve a pleasing balance, while lemon juice adds brightness and supports the set. Most importantly, the cold-saucer test gives you a practical way to judge the jam instead of depending blindly on a timer.
Make it when plums are plentiful, fill a few jars, and you will have a wonderfully useful preserve for toast, scones, cakes and desserts long after the fresh fruit has disappeared from the kitchen.
For more classic recipes from the same culinary tradition, you may also enjoy our apple crumble recipe or all-in-one Victoria sponge.
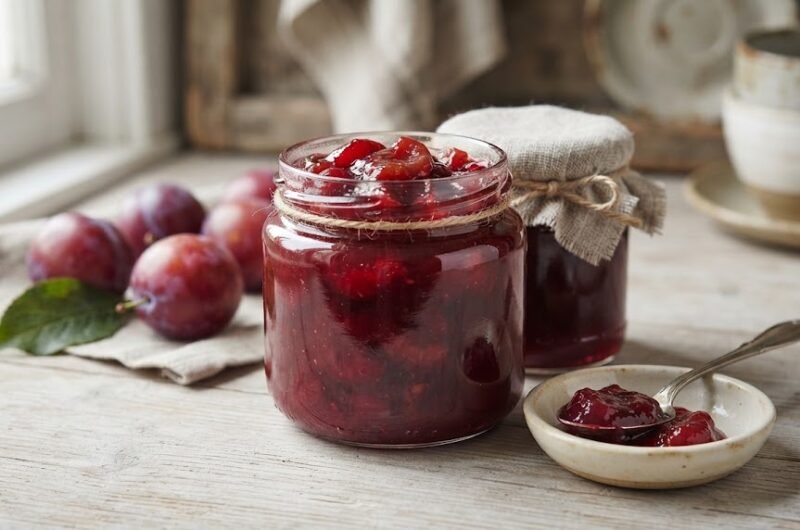
Delia Smith Plum Jam Recipe
4
servings15
minutes40
minutes50
kcal55
minutesA traditional homemade plum jam made with ripe plums, granulated sugar and lemon juice. It has a rich fruity flavour, a glossy texture and a lovely balance of sweetness and tartness. Perfect for toast, scones, crumpets and baking.
Ingredients
1 kg ripe plums, stones removed
750 g granulated sugar
Juice of 1 lemon
A little water, only if needed
Directions
- Wash the plums, cut them in half and remove the stones. Weigh the fruit after stoning.
- Place the prepared plums in a large, heavy-based preserving pan.
- Cook gently over low heat until the plums soften and release their juices. Add a small splash of water only if the fruit is firm and begins to stick.
- Add the granulated sugar and stir until it has completely dissolved.
- Add the lemon juice, then increase the heat and bring the mixture to a vigorous boil.
- Continue boiling, stirring occasionally, until the jam thickens and reaches setting point.
- Test the jam by placing a small spoonful on a chilled saucer. Leave it for a few seconds, then gently push it with your fingertip. If the surface wrinkles, the jam is ready.
- If it has not set, boil for a little longer and test again.
- Carefully transfer the hot jam into clean, sterilised warm jars and seal.
- Leave the jars to cool completely before storing.
Notes
- Use ripe, flavourful plums for the best result.
- Very juicy plums may not need any added water.
- Do not rely solely on cooking time; the setting test is the best guide.


